This is only a brief description of how to track a path on a simple map/image. If you want to use GPX tracks/GPS/GIS data you need to dig deeper: blender-osm can import GPX-tracks and project them on the terrain.
Manual Tracking a Path On a Map
- create a plane with a map image. A convenient way to do this is the use of the "Import-Export: Import Images as Planes" add-on that is shipped with Blender. Activate it in the preference settings.
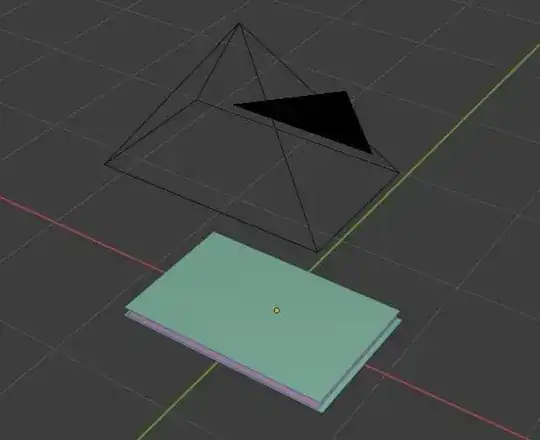
- position the camera vertically above the image
- to animate the camera keyframe the Location
- to zoom in and out keyframe the Scale of the image
- create a Nurbs Path (add Object: Curve > Path)
- in Edit mode, use menu Curve > Set Spline Type to
Poly
- create waypoints by extruding (E) the control points along streets, etc
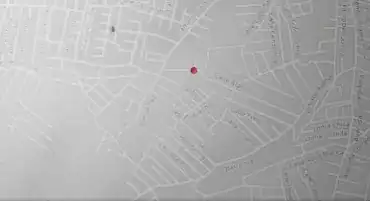
- create a marker (red dot, it's actually a sphere)
- add a Follow Path object constraint
- use the "Animate the Path" for quick animation, use the graph editor for more control, e.g. add stops, control speed, etc.
- create a waypoint object. This will create the red line
- add an Array modifier and a Curve modifier to make it follow along the path
- move x position to a negative value, so the marker starts at the beginning of the curve/path. I've bent it down along the z-axis to hide the beginning. Not sure if this is the best way to do so
- animate the x position with a driver to make it "mark" (move along) the path/curve.
- formula for the driver of the x position looks like
min(-2.50753 + (2.50753 * (frame-1) / 180), 0). This makes the marker follow the curve for 180 frames and then stop. The -2.5073 is the start value to set the marker at the beginning of the curve. It depends on the length of the curve/path. Just pull it along the x-axis by eye.

Zooming Effects
- you can zoom in and out if you scale up/down the image in front of the camera
- if you want to do a zoom effect that exceeds the details of the map image you can use multiple images with different levels of detail.
- stack the images, increase the Scale of the image to match the level of details of the next image. Adjust the transparency (Alpha value) of the image for an overview and to match the scale.
- keyframe the Scale of the image. At the frame where the level of details match, turn off the render visibility
Result